Background

Tuesday, May 31, 2011

Lasagna Cupcakes


Read the title again. Think about it. I know you're wondering what I mean. Well, relax, because I'm on to something.

Every time that I've ever made lasagna, I've always ended up with nearly a full pan of left overs. That never get eaten. Great. So I found a solution.

Lasagna Cupcakes 

- 12 oz. ground lean beef
-1/4 teaspoon salt
-1/4 teaspoon pepper
-1 cup chopped onion
-1/2 cup chopped mushrooms
-1 can crushed tomatoes or tomato sauce
-2 cloves garlic, minced
-3 teaspoons dried oregano
-1/2 teaspoon dried basil
-1 1/2 cup part-skim ricotta cheese
-24 wonton wrappers
-1 1/2 cup shredded cheese

Step 1: Making the sauce. 
Fairly simple, really. Just your basic meat sauce.

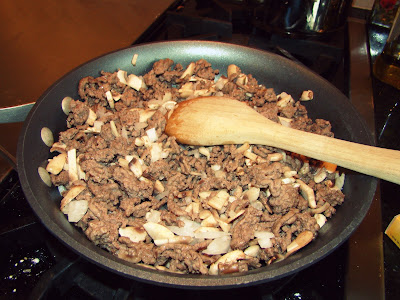
Saute the mushrooms, garlic and onions as the meat browns in a saucepan. 
Oh look, I forgot to take pictures of the sauce after it became a sauce. To finish the sauce, pour the tomato sauce or crushed tomatoes into the meat mixture along with 2 tsp. of the dried oregano. Bring the sauce to a low boil and then turn down to a simmer for 10 minutes. Remove from heat, and you're done!

Step 2: Ricotta filling
I once again took not near enough pictures. Combine the ricotta cheese, a pinch of salt, a pinch of pepper, the remaining oregano, and basil together to complete the cheesy lasagna filling. 


Step 3: Make those cupcakes! 
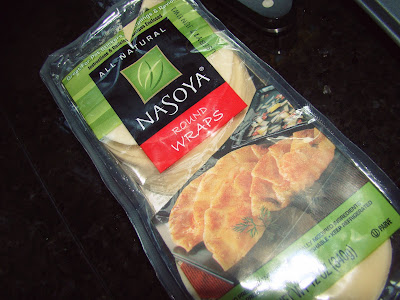
Spray a muffin pan and line with wonton wrappers. I used the round wrappers so that the corners wouldn't be sticking out of the muffin pan and burn during baking. Press the wrappers into the bottom of the pan and press all the way to make sure they form the correct shape. You'll then layer the sauce, ricotta, and mozzarella cheese. Add another wonton wrapper and repeat the steps. Simple as that. 

Most people I know have never used a wonton wrapper. They're located in the refrigerated section of the ethnic food section. If you're from around here (and if you know me, then you know where "here" is) and you go to Kroger, they're at the bottom of a cooler in the ethnic/organic food section next to the bakery). 


Step 4: Bake!
Bake at 375 degrees for about 10 minutes or until the cheese is melted and golden. 


Step 5: Convert to a Lasagna Cupcake believer. 
It will happen. At least I think so. Perfect serving size in my opinion. And the best for portion control. Let's be honest- it's a lot easier to cut a bigger piece of lasagna and get away with it than it is to eat numerous cupcakes. I had leftover sauce, just a warning. So if you want to cut the sauce recipe down, feel free. But overall, they turned out pretty darn good.


Another success. I'll take it. 

Monday, May 23, 2011

Summer Caprese Pasta


Summer Caprese Pasta.

-1 lb. Rigatoni or Penne Pasta (I chose Rigatoni)
-1 1/2 cup Tomato sauce
-2/3 cup Heavy cream
-1/3 cup Grated Parmesan cheese
-4 oz. Fresh mozzarella
-Grape tomatoes
-Fresh basil


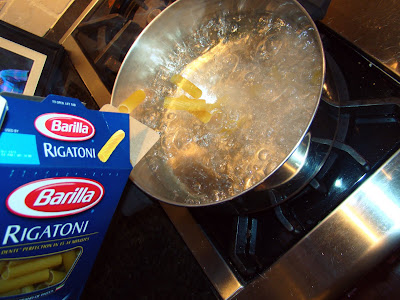
Step 1: Boil the pasta. 
Need I say more? Okay, I will. I suggest seasoning the pasta with salt while it's boiling. It's the only chance you'll have to season the pasta all by itself. Also, make sure to stir the pasta occasionally to prevent it from sticking to the bottom. I only tell you this stuff in case you don't know how to boil water. Some people joke about it, for some, it's a real problem. 

Also, just a reminder, because I always forget: dump pasta AFTER the water is boiling. 


Step 2: Make the sauce. 
Pretty darn simple. I made it while the pasta was boiling to kill time. First, heat 1 and 1/2 cup of your favorite tomato sauce on the stove in a large sauce pan or pot. You'll mix the pasta in, so even though there isn't much sauce, you need room for the pasta. Once the tomato sauce is warm, add 2/3 cup heavy cream.  Then mix in 1/3 cup grated parmesan cheese. I recommend freshly grated cheese. It has a much smoother texture and a sharper taste. 


Step 3: Mix it all up.
Strain the pasta and mix into the sauce. Fold it in slowly until all of the pasta is covered. 


Step 4: Add the goodies.
What makes a great Italian dish for me? Fresh basil, fresh mozzarella, and fresh tomatoes. De-lish. After mixing the sauce while the pasta is boiling or after mixing the pasta in (whenever you next have time) cube the mozzarella, halve the tomatoes (if you prefer, you can keep some of them whole), and chiffonade the basil. Add the ingredients and mix into the pasta. 


What does chiffonade mean?!?
A chiffonade is a cooking technique which is frequently used with basil or spinach. Sounds super difficult and technical. Nope. It turns out it's pretty darn simple. Here's a little how-to....

 Start by washing the basil leaves. Stack two or three of similar size. 

Roll the leaves up tightly. 

Simply chop down the line in thin strips. Bada bing bada boom- you've just completed a chiffonade! :)


Step 5: Get ready to cook!
Pour the pasta into a greased 9x13 pan. Top with slices of fresh mozzarella and bake for 25-30 minutes at 350 degrees until cheese is melted and bubbly. 


Step 6: How good does this look?
All done. Hello, yummy summer pasta meal. :)

De-lish!

Friday, May 20, 2011

Swiss 'N' Shroom Stuffed Burgers


Swiss 'n' Shroom Stuffed Burgers.

I had seen a burger called the "Juicy Lucy" on Man v. Food a while back. It was burger filled with American cheese. Blan on the outside, oozy on the inside. And so came an idea: stuffing a burger with two of my favorite toppings: sauteed mushrooms and swiss cheese.

Amounts will vary depending on servings.
-Ground beef
-Swiss cheese slices
-Baby Portabella or Button Mushrooms
-Hamburger Buns
-Olive Oil
-Onion Powder
-Garlic Salt
-Seasoning Salt
-Salt
-Olive Oil


Helpful Hint
Before I start this "tutorial", I just want to give  you all a helpful little tip about mushrooms. Mushrooms are one of the dirtiest "vegetables" in the store after you get them home. Still covered in dirt and soil and whatever else. Obviously, they need to be washed. Badly. But here's a fun little tip: don't rinse them under running water like you would a regular piece of produce. Running water will flood the mushrooms and add water to them. Instead, dampen a paper towel and wipe off the dirt. It's a little time consuming, but can prevent the mushrooms from becoming a little slimy. 


Now back to those burgers. 

Step 1: Cut and saute the mushrooms. 
Slice mushrooms and put in a medium skillet. I saute my mushrooms with olive oil instead of butter, but that decision is up to you! I just drizzle olive oil around the skillet two times and that should be enough. You don't want to make the mushrooms to greasy. It will seem like that's not enough, but they'll cook way down and soak it all in. A dash or two of onion powder, garlic salt, and seasoning salt and you'll be good to go. Just let them chill out on low heat for about a half hour with occasional stirs and they'll be ready. 

Before

After


Step 2. Make those burgers! 
Usually when I make burgers at home, they're big, juicy, third-pounders. I got that from my daddy. But not tonight. Because I stuffed them, they needed to be pretty thin. I went for about a quarter-inch thickness. Just ball up some of the hamburger and pound out your frustrations. Feels nice, doesn't it? I learned a little trick from the Triple XXX diner in my new hometown of West Lafayette, IN. Boiler Up! Bread those burgers with a pat down of flour before cooking them. I'm not talking about caking on the flour, just a light coating similar to the coating left on after rolling out dough. This is particularly helpful with thin burgers. I suggest sprinkling flour down on the "pounding" surface before the pounding.  Otherwise, you'll end up like me and end up trying to scrape the meat off the board without messing up the newly formed burger. 

Thin burger.

Floured burger. 


Step 3: Stuff the burgers.
Slice of swiss cheese and a small (keep it small, remember, you have to fit it inside of the burger) amount of mushrooms on top of one of the burgers. Simple enough. Then lay the other burger on top. Pinch the ends together to lock in the toppings. 


Step 4: Cook them things! 
I pan fried my burgers. I turned the skillet on medium heat when I first started pounding out those burgers. I'd let it heat up for 5-10 minutes so it's pipin' hot when you put the burger on. High heat from the start will help to sear the burger. Once you get a good sear, you have a nice little crisp on the outside of the burger. Golden. Cook on one side for 4-5 minutes then flip over to sear the other side. Cooking time is up to you and dependent upon how you like your burgers. 


Step 5: Nom nom nom. 
Just look at this. 'Nuff said. 

Thursday, May 19, 2011

Peanut Butter Chocolate Brownie Cups


Peanut Butter Brownie Cups.

-3/4 cup granulated sugar
-1/4 cup butter, softened
-1 Tablespoon water
-1 cup semisweet chocolate chips
-1 large egg
-1/2 teaspoon vanilla
-1 cup all purpose flour
-1/4 teaspoon baking soda
-3/4 cup milk chocolate chips
-3/4 cup creamy peanut butter

A few more ingredients this time, but nothing too complicated. 


Step 1: Melt first ingredients.
In a microwave safe bowl, combine the sugar, butter, and water. Microwave for 30-45 seconds until butter is melted. 


Step 2: Add chocolate.
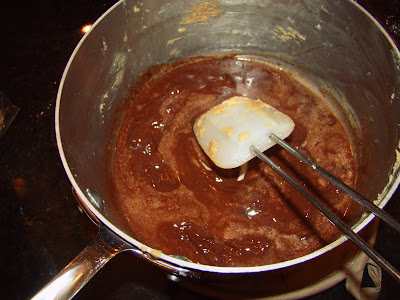
Stir in 3/4 semi-sweet chocolate chips. They will melt from the heat of the melted butter. 


The chocolate chips should be melted after about a minute of stirring.


Step 3: Add eggs and vanilla. 
Add the egg and vanilla to the chocolate mixture.


Step 4: Add final ingredients. 
Mix in the flour and baking soda until well combined. Let batter cool to room temperature. Then mix the rest of the chocolate chips (both the milk chocolate and semi-sweet chocolate) into the batter. 


Step 5: Bake away!
Finally, a post where I can tell you to really bake! I can't believe it's actually taken me 4 posts to get here!  Divide the batter equally into a greased muffin pan. When I first saw a picture of these, I thought they were made in mini muffin pans. Nope. Full size muffins. Wow-za. But they're delish. Anyway....pour the batter in a greased muffin pan and bake at 350 degrees for 13-14 minutes or until an inserted toothpick comes out with a little bit of batter on it. You don't want to bake the brownies completely, but you want to come close. 


Step 6: Peanut Butter Time! 
While the brownies are in the oven, melt the peanut butter in a separate microwavable bowl for 30-45 seconds. Stir it until all of it is melted. 

Is there anything in life better than melted peanut butter? Because I think this might be the best thing ever. 


Step 7: Make 'em pretty!
When the brownies are removed from the oven, they may fall in the center from not being baked long enough. This is ideal. BUT if they don't, (no fear...mine didn't fall) take a tablespoon and make a slight indention in the center of each muffin. This is where you will pour the peanut butter. After adding the peanut butter, sprinkle some extra chocolate chips on top for extra decoration and delicious-ness. :)


Seriously though- amazing. 


Step 8: Let cool and eat! 
When I say "let cool and eat", I wouldn't actually recommend that. They're good at room temperature, but they're best warm. And if you're going to waste this many calories on something, it better be the best it can be. Here is my recommendation: IF you can wait long enough for them to cool to room temperature (cool them in the pan) then they'll be much easier to remove from the muffin tin. I used a knife to go around the edges of mine to remove them. They're a little bit different from most things you make in a muffin tin; you can't just turn it upside down and shake until they fall out. Put some care in them not to break them. IF you can wait, do that and then reheat them in the microwave for about 15 seconds before eating. I made these last night but ate one today. It was Heavenly, people. Heavenly. 

I laughed out loud after trying the first bite. Yes. That. Good. 


This is probably the best I've posted so far. In my opinion. I hope you enjoy! These look pretty threatening, but I promise if you go step by step (as offered by yours truly) they're a snap! So delish! 

Wednesday, May 18, 2011

Peanut Butter Chocolate Bars


Peanut Butter Chocolate Bars.

-1/2 cup butter
-1 3/4 cups confectioner's sugar
-1 cup peanut butter
-3/4 cup graham cracker crumbs
-1/4 cup butter
-1/2 cup semi-sweet chocolate chips

What is it with me and 5 ingredients?


Step 1: Make graham cracker crumbs.
Put 5 or 6 graham crackers in a bag and roll with a rolling pin. This should make about 3/4 of a cup of crumbs. 
5 graham crackers should be just enough.


Step 2: Start melting.
Melt the 1/2 cup of butter on low heat. After melted, remove from heat and stir in confectioner's sugar. Then stir in peanut butter and graham cracker crumbs. 
As you add the confectioner's sugar, it may clump. Add it slowly. 

The butter and confectioners sugar will be very dry and lumpy. The peanut butter will help to smooth it out. 

The graham crackers will thicken the mixture to the final consistency. 


Step 3: Form the bars.
Press the dough into a foil lined 9x9 pan. This will make cleanup easier. If you haven't noticed- it's my favorite trick. I use it all the time! 
Make the dough as even as possible so that the chocolate on top will be even too. 


Step 4: Melt the chocolate. 
Melt the 1/4 cup of butter on the stove and stir in the chocolate chips. Remove the chocolate from heat before the chips are completely melted. Stir the chocolate until the rest of the chips are melted in. 

Mix the chocolate chips in but do not let the melt the whole way.

Remove from heat. The heat from the other chocolate will continue melting the unmelted chips. 


Step 5: Pour the chocolate.
Now pour the chocolate on top of the bars, spread, and refrigerate. 

Spread out the chocolate and refrigerate! All done! 


Step 6: Eat 'em up! 
Remove the foil from the pan and cut into whatever size you would like! Enjoy! 

Yumm-ooo!!!!